Process:
I took photos with my three-year-old Sanyo flip phone


Then I sent the pictures to my email account.

A day or two after the outing I opened the images in Photoshop.
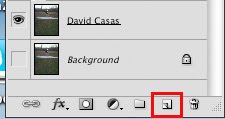
I selected one of the images to be my base image and duplicated it by dragging it to the "create a new layer" icon (see red outlined icon in image above) at the bottom of the Layers Pallete.

Next, I copied each of the other four player's photos into the file chosen to be the base image for compositing.

With all the players' photos in the same file, I selected one of the players image layers (a layer turns blue when selected) and clicked on the "Add Layer Mask" icon (see red outlined icon in image below) at the bottom of the Layers palette.

This action adds a white rectangle next to the photo icon in the Layers palette (see red outlined icon in image above).
The Paintbrush tool was then selected from the Tool palette (see red outlined brush icon in image to the right).
Then I made sure that Black was the Foreground color and White was the Background color in the color squares at the bottom of the Tool palette (see red outlined icon at the bottom of the image to the right). Those are the colors that appear in the Color squares when the mask rectangle in a layer is selected.
Painting with the color Black will hide or "mask" areas of an image. Painting with the color White will reveal the "masked" areas of an image.
With the layer mask selected in one of the player's photos and Black as the foreground color, I began "painting" that photo with the paintbrush, "masking" the parts around the player I didn't want to show.

When the four players photos were "masked" to my satisfaction, I moved them around so they were on different parts of the teepad to make it look like there were five people teeing off at the same time.
There was a bit of a problem with the player in the red, white, and yellow jacket at the far right of the picture. When photographed the sun was not behind clouds as it was with the other four players. This caused him to be over saturated meaning he appeared brighter than the rest of the players.
This was corrected by making an adjustment to his layer's Levels (another subject for another post). The adjustment was to knock back that saturation or brightness enough that it looked about the same as the rest of the players.
Once the image was completed to my satisfaction, I saved the Photoshop file as a PSD document. Then I saved it as a flattened TIFF document. I could have saved it as a JPEG file but that is a compression that takes compresses or takes away some of the image information or pixels, colors, etc. A TIFF file compresses a file but leaves more image information than a JPEG compression.
Had I been thinking ahead at the time of shooting the players, I would've turned my flip phone sideways so I would have shot in a "landscape" format. But the idea of compositing these images didn't come to mind until two days later when I tried loading the individual images on the players' Facebook pages. I could only load one up. It was shortly after several attempts to load the individual images that the concept of compositing the players together into one composite photo occurred.
Finally, I cropped the image with the crop tool (red outlined icon in image to the right). I shot the original images in a "Portrait" format where an image is taller than wide. This cropping left the image in a "Landscape" format where an image is wider than it is tall. The final image is shown below.

The compositing process that I used and described is just one way to composite images. Compositing can be accomplished with any image editing software such as Photoshop, Photoshop Elements, Gimp, PaintShop Pro, etc. One thing is certain as a graphic designer, just like disc golf, I'm still learning.
1 comment:
That is a cool photoshop project!! I hope you're doing well. I wonder if you can do me a favour. I can't access my account at Mandolin Cafe and I have no idea what address or password I used there because I never go there these days. Could you send me a pm on the Cafe so that I'll see what address the notification comes to? Or if it arrives at all.. thanks so much in advance and have a great week!
Post a Comment